Tutorial for adding additional fields to the ISG Modbus API
Disclaimer: This tutorial guides you in making changes to your ISG. This may affect the warranty. You can damage your ISG's SD card if you're not careful. Any changes you make are therefore at your own risk. If you're not experienced in making these kinds of changes, don't do it.
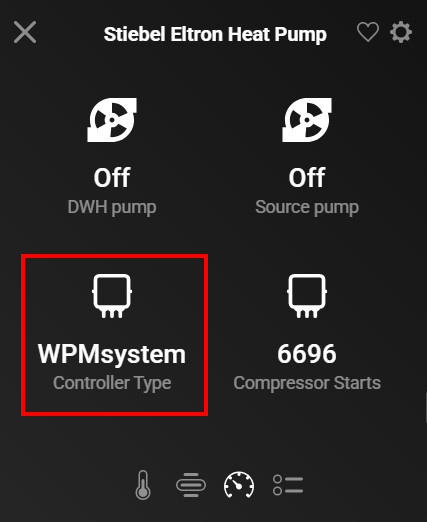
There is a difference in the changes we need to make to the ISG for the different systems it supports. There are 3 systems the ISG supports, the API mapping is in the corresponding XXX-isg-modbus.csv file. It is clearly mentioned in the steps what to do for what system. If you are not sure what type of heat pump you have, you can check the Controller Type property in the Homey App:
In this tutorial we are adding additional fields to the ISG Modbus API for better monitoring of the power consumption of your heat pump using the Homey App. First of all, this tutorial is based on the wonderful work of the guys at Loxwiki and the article written by Jan Wachsmuth zusätzliche Objekte im ISGweb für modbus/TCP freischalten. All the kudo's go to these guys.
This tutorial is made from the perspective of a Windows user, that is why we are using Ubuntu Desktop. All steps can also be performed using a terminal session, please refer to the article mentioned above. If you are a Linux user you can still use this tutorial as eventually we are using Ubuntu to make the changes we need to the ISG MicroSD card.
What are we going to do:
- Create a bootable Ubuntu Desktop
- Get the MicroSD card from the ISG, make a clone copy to a new MicroSD
- Boot into Linux and make changes to the new MicroSD card
- Put the new MicroSD card back in the ISG
The MicroSD card in the ISG has a Linux EXT3 partition on it. Linux partitions cannot be mounted or read in Windows. There are some obscure EXT3/4 drivers and tools for Windows, but none of them are really reliable and most of them only let you read from the partition. And we need to change data. That is why we are using Ubuntu Linux.
You need the following hardware:
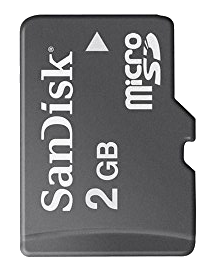
Empty MicroSD card (2GB is fine) for cloning the original MicroSD card
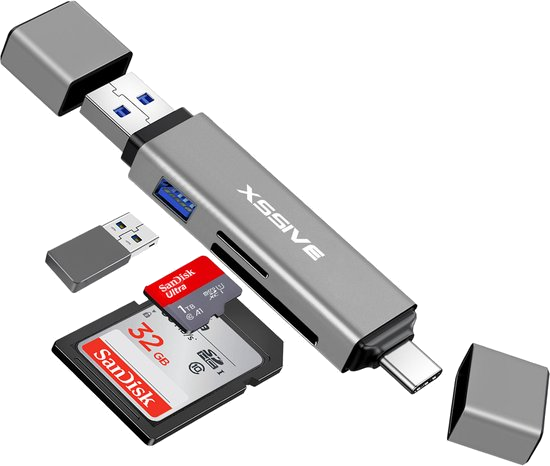
SD card reader supported by Ubuntu (Linux), 2 examples below:
MicroSD to SD card converter + SD card reader (laptop or hub)

USB MicroSD card reader
Laptop / PC
Empty USB stick or Drive for a bootable Linux
Step 1: Download Ubuntu Desktop
Go to the Ubuntu website and download the latest ISO of the Desktop version, current version is Ubuntu 24.04.3 LTS
Download Ubuntu Desktop: https://ubuntu.com/download/desktop
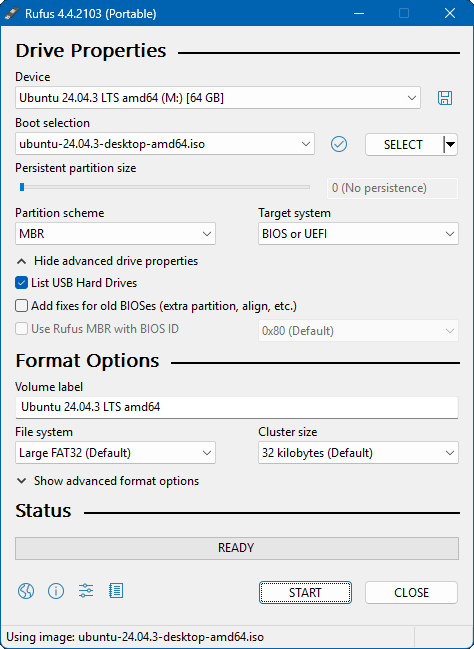
Step 2: Download an image to USB writer like Rufus (or balenaEtcher) and write the Ubuntu image to the USB drive
Download Rufus: https://rufus.ie/en/#download
Start Rufus. Select your USB drive (M: in my case), if it is not listed you might need to check 'List USB Hard Drives'. Select the Ubuntu ISO image you downloaded in step 1 and start the process. Your USB drive will be written with Ubuntu.
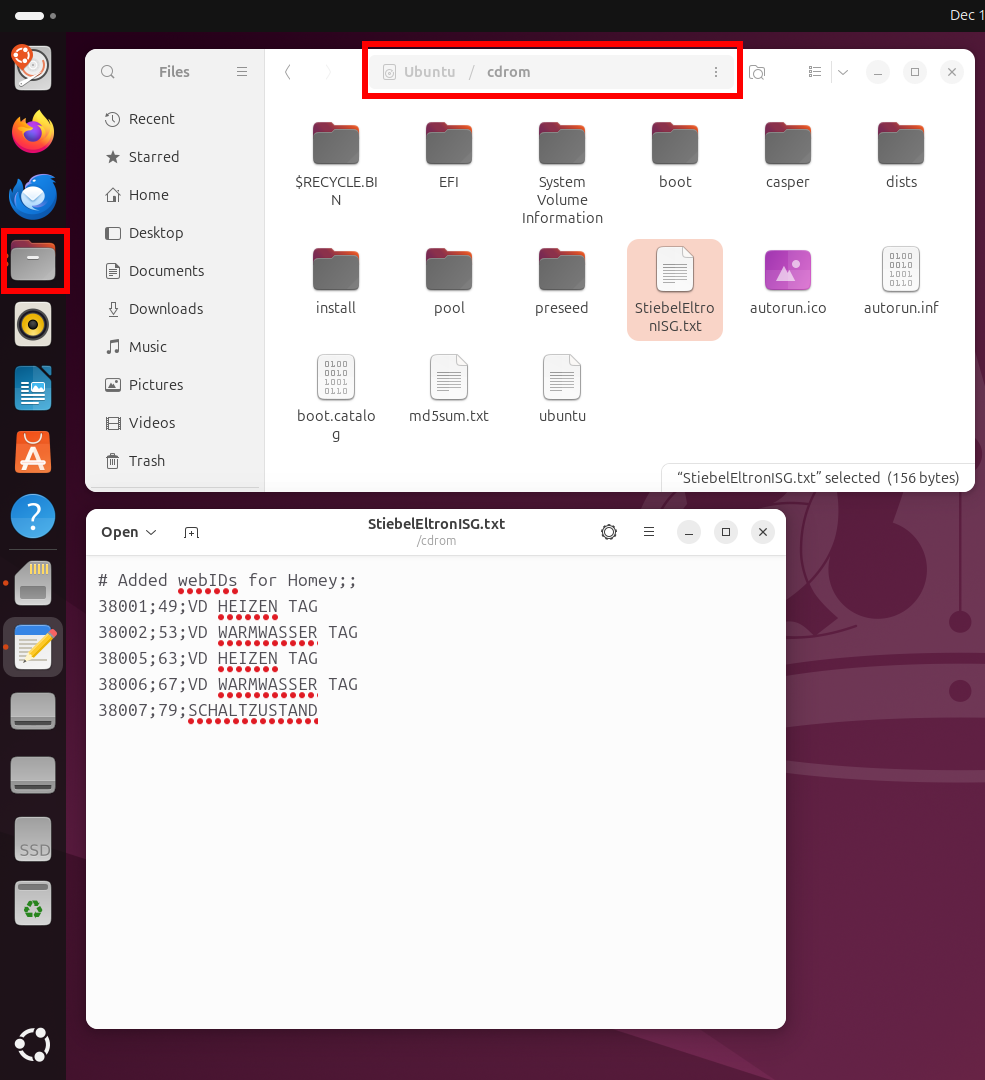
Step 3: Add a text file to the USB drive
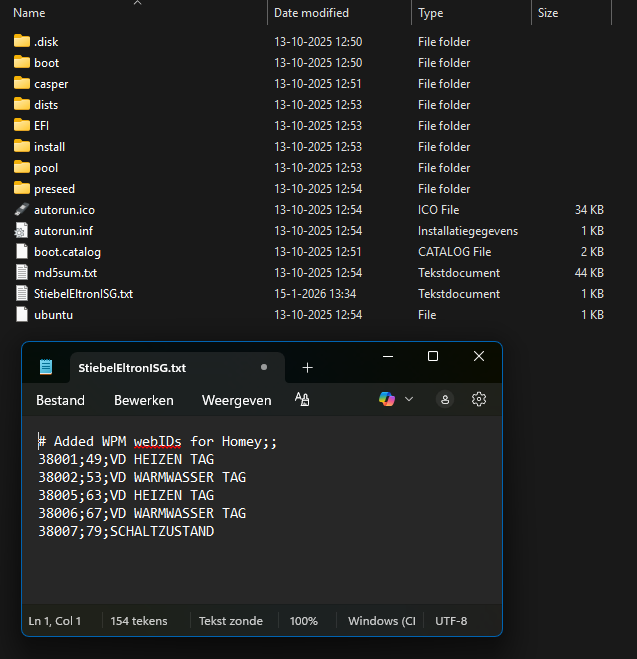
Open the USB drive in the File Explorer and create a text file on the drive with the name 'StiebelEltronISG.txt'. Open the file in notepad and add the content for your heat pump type.
For WPM (WPMSystem / WPM4 / WPM3 / WPM3i) based systems:
# Added WPM webIDs for Homey;;
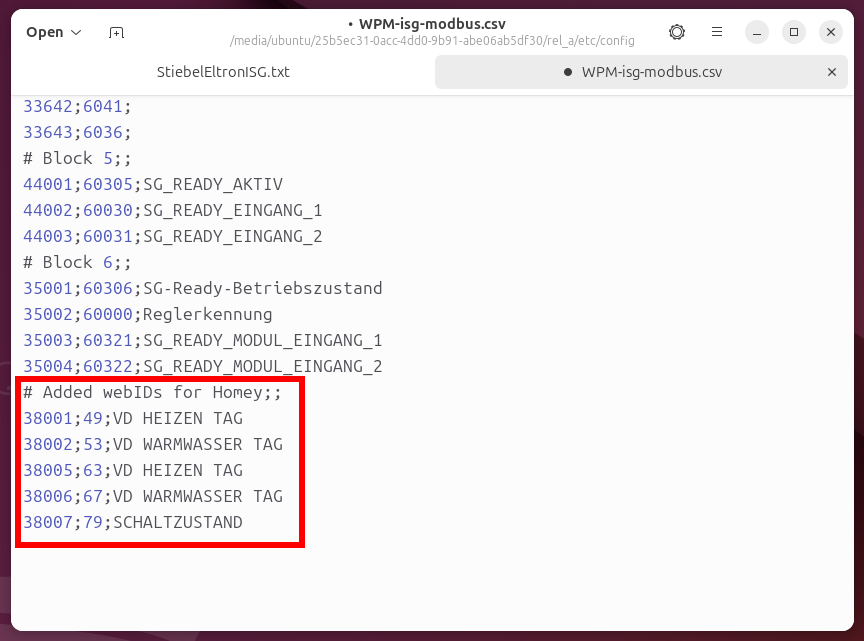
38001;49;VD HEIZEN TAG
38002;53;VD WARMWASSER TAG
38005;63;VD HEIZEN TAG
38006;67;VD WARMWASSER TAG
38007;79;SCHALTZUSTAND
For LWZ based systems:
# Added LWZ webIDs for Homey;;
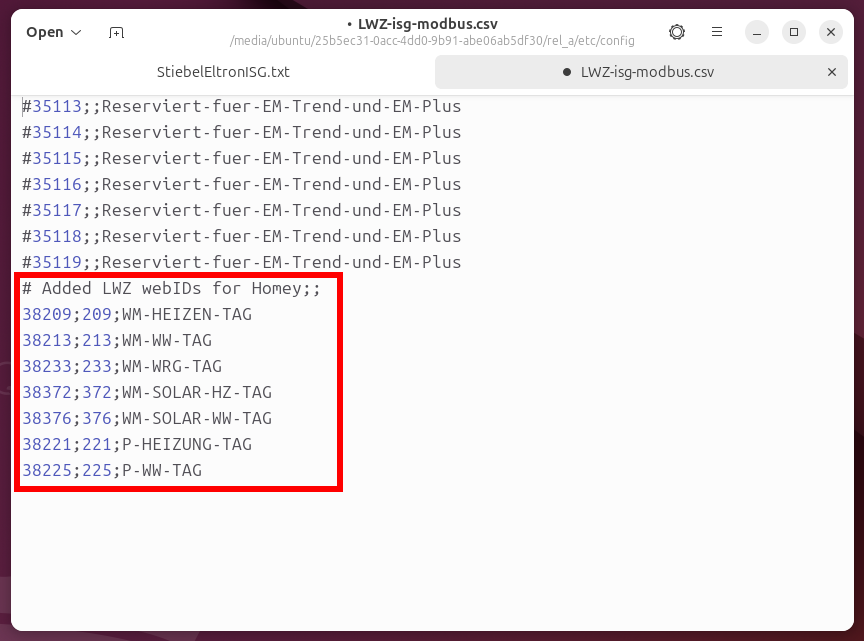
38209;209;WM-HEIZEN-TAG
38213;213;WM-WW-TAG
38233;233;WM-WRG-TAG
38372;372;WM-SOLAR-HZ-TAG
38376;376;WM-SOLAR-WW-TAG
38221;221;P-HEIZUNG-TAG
38225;225;P-WW-TAG
These are the fields, with the corresponding mapping, we want to add to the API. This text file helps us copy and paste these fields to the correct definition file on the MicroSD card. There are more fields you can add, but for the Homey App you only need these.
For WPM based systems this should look like this:
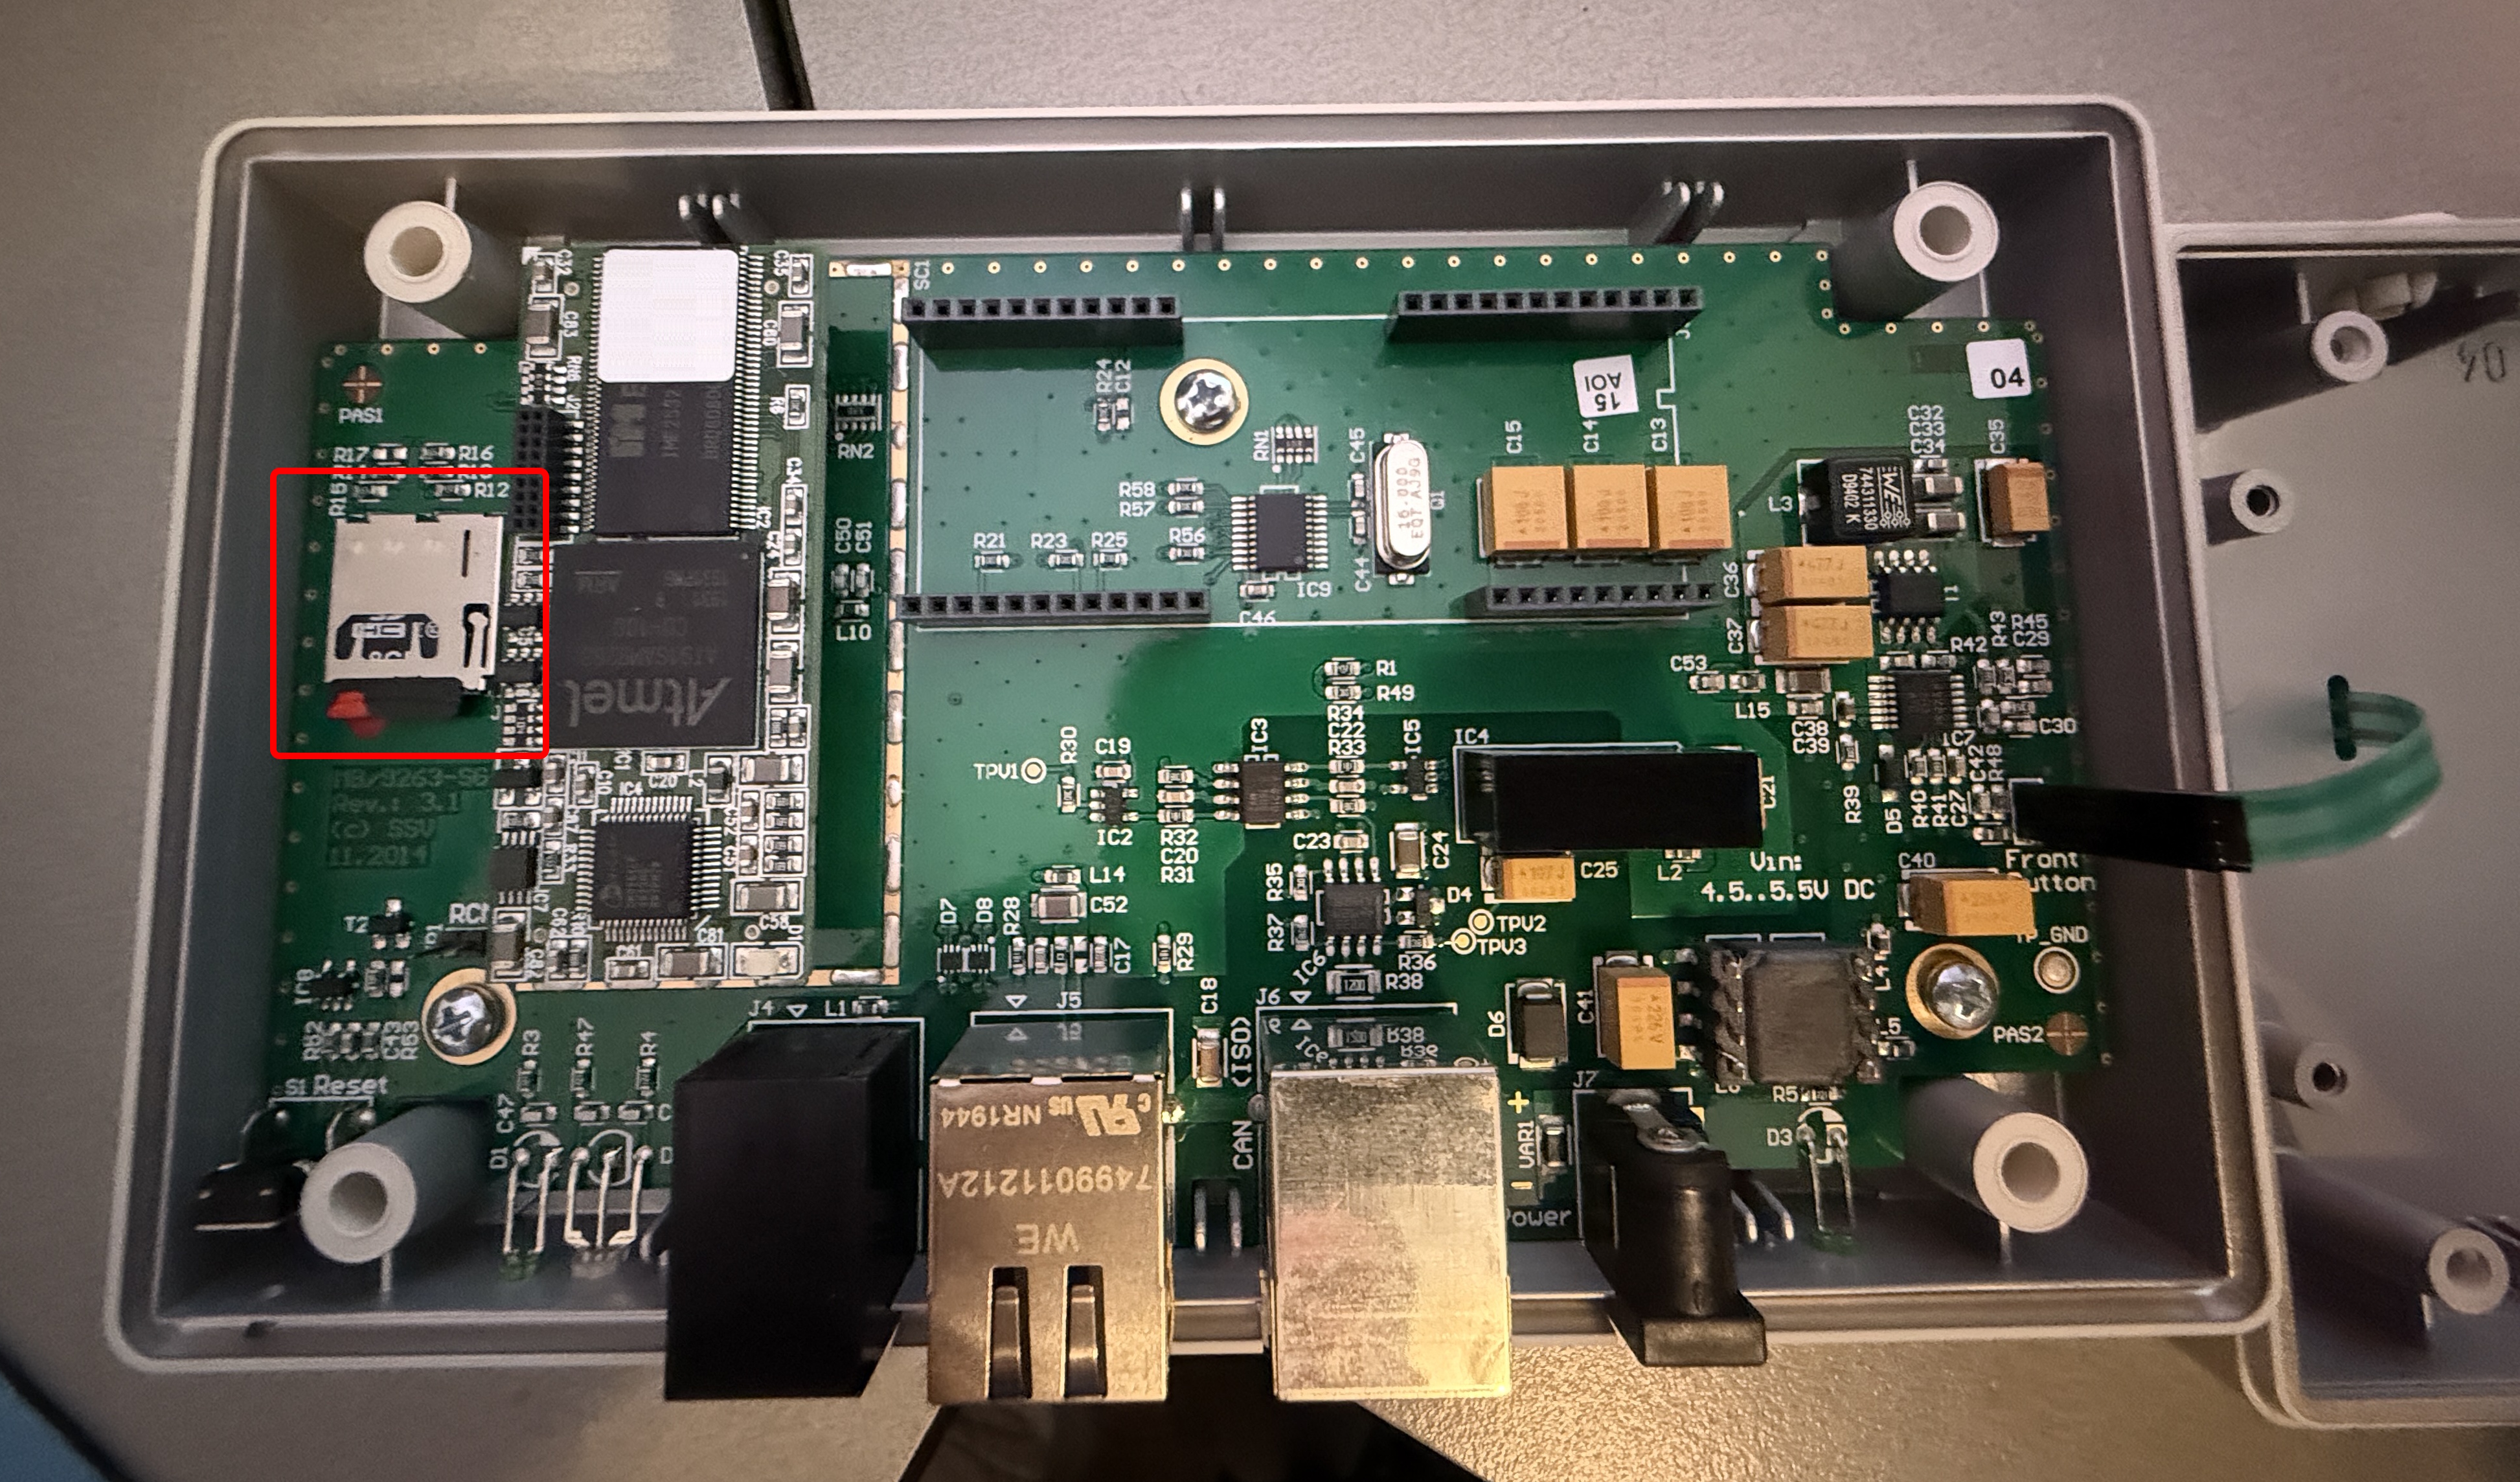
Step 4: Open the ISG and remove the MicroSD card
Disconnect the ISG and remove the four screws to open the ISG. Be careful not to damage the flat-cable from the mainboard to the front buttons. Remove the MicroSD card.
Step 5: Create a clone backup of the MicroSD card
We are using Win32 Disk Imager to create an image of the original ISG MicroSD card and write it to the new MicroSD card.
Download and install Win32 Disk Imager: https://sourceforge.net/projects/win32diskimager/files/latest/download
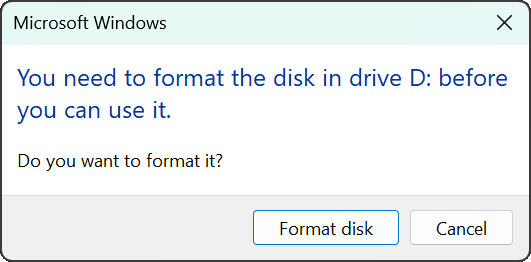
Insert the original ISG MicroSD card in the card reader. I am using a MicroSD card to SD card adaptor for the SD card slot in my laptop. Keep in mind that Windows cannot read the partition on the MicroSD card.
Windows may display a dialog to format the drive. DO NOT FORMAT THE DRIVE or all the data on the original MicroSD card will be lost.
Start Win32 Disk Imager and select the drive with the original ISG MicroSD card, in my case this is D:\ . Under Image File you can enter a name for the image we are creating. Press Read to create the image file from the MicroSD card.

The newly created image file should be around 232 MB. Keep this file as a backup. Remove the original ISG MicroSD card from the reader and store in a safe place. You can always return to the factory configuration by switching back to this MicroSD card.
Step 6: Write the image to the new empty MicroSD card.
Insert the new empty MicroSD card in the card reader. Select the image we have created in the previous step. Press Write to write the image file to the MicroSD card. You have now created a clone copy of the original MicroSD card. We can now make the changes we need on the newly created copy.
Step 7: Boot into Linux
Insert the USB drive with Ubuntu Desktop in the PC/laptop with the card reader. Restart the computer. It should recognize the installation media automatically. If not, try holding F12 during startup and selecting the USB device from the boot menu. F12 is the most common key for bringing up the system boot menu but, F2, F8 and F10 are common alternatives.
Once the installer has initialized, you are can select your language. Go through the dialog, internet is not required, until you get to the following page:
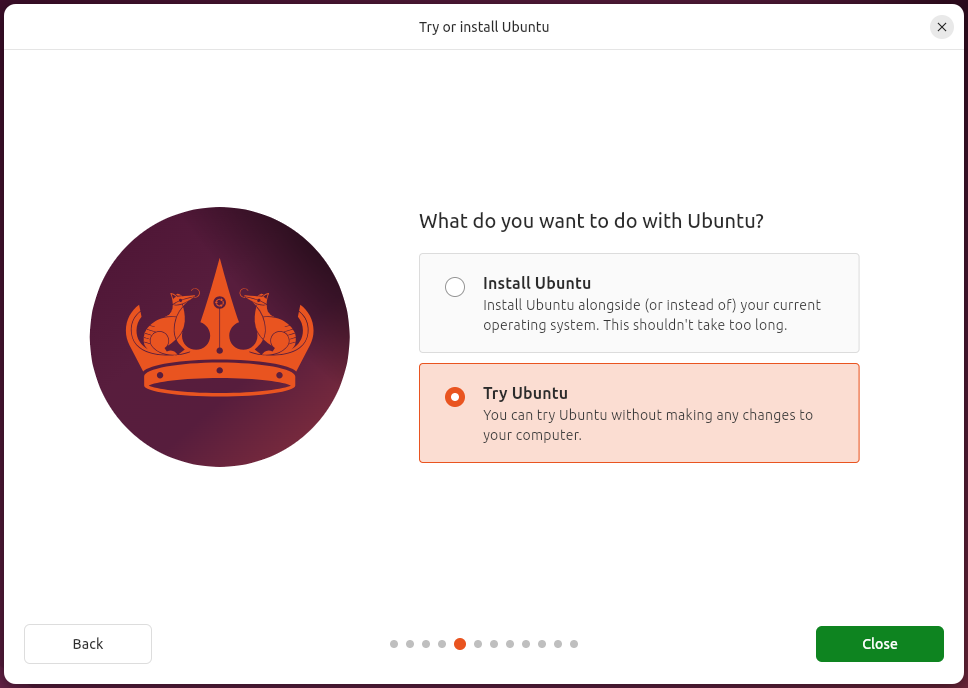
Select Try Ubuntu, do not install Ubuntu. We only need Ubuntu to edit content on the MicroSD card.
Ubuntu will now start to the desktop environment.
Step 8: Making the changes
In the Ubuntu Desktop environment click on the Files icon to open a file explorer. Go to the top path edit box and type '/cdrom' and press enter. The file browser will now open the USB drive with the Ubuntu iso and the 'StiebelEltronISG.txt' text file.
Right click the 'StiebelEltronISG.txt' text file and select Open With..., select Text Editor and click Open.
To open the SD card, click on the Memory Card icon or select the correct volume in the file explorer.
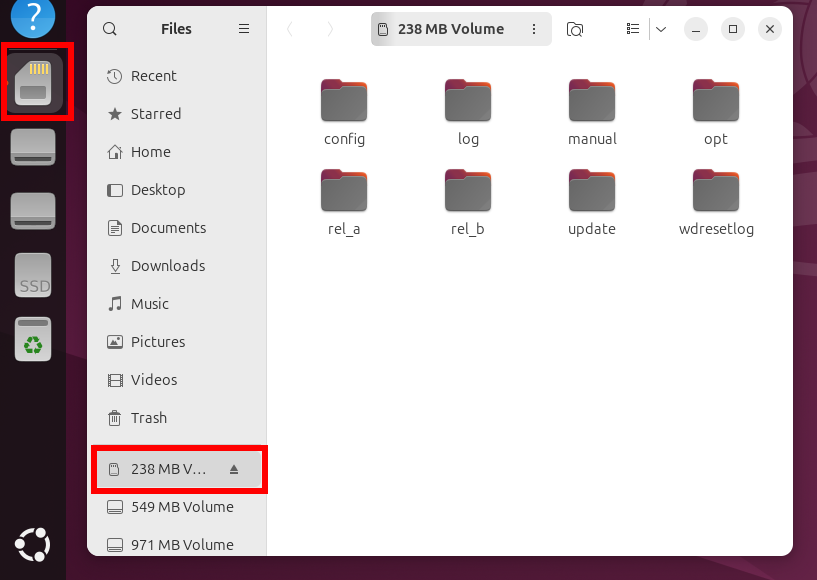
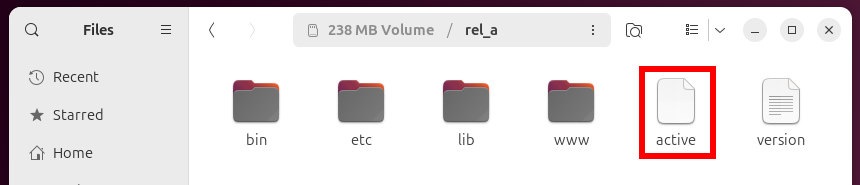
The SD card has 2 directories for the firmware 'rel_a' and 'rel_b', one is the active firmware and the other one is a previous version. The active firmware has a 'active' file in the directory, the version file contains the version of the firmware in the directory. Check both directories and go to the one with the 'active' file. In my case this is 'rel_a'.
Now go to the 'etc/config/' subdirectory, there you can find the XXX-isg-modbus.csv files. We are going to edit the file with the API mappings for your system:
- WPMSystem / WPM 4 based systems: Use WPM_SYSTEM-isg-modbus.csv
- LWZ based systems: Use LWZ-isg-modbus.csv
- WPM3/WPM3i based systems: Use WPM-isg-modbus.csv
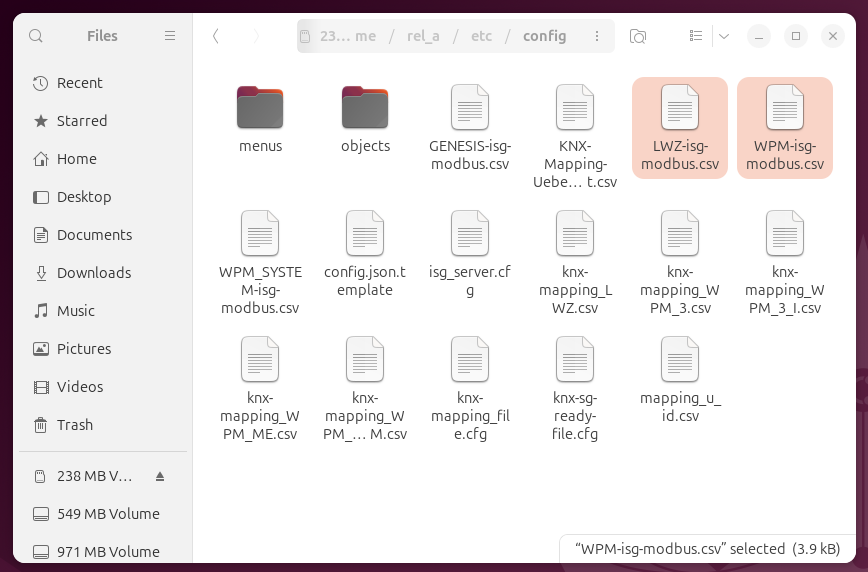
Right click one of the csv text files specific for your system and select Open With..., select Text Editor and click Open. Both the 'StiebelEltronISG.txt' and the 'XXX-isg-modbus.csv' files are now open in the text editor. By clicking the tabs on top, you can switch between them. Go to the 'StiebelEltronISG.txt' file select all the text (CTRL-A), copy the text (CTRL-C). Go to the 'XXX-isg-modbus.csv' file, scroll to the end (CTRL-END) and paste the text (CTRL-V).
For WPM based systems the 'WPM-isg-modbus.csv' should now look something like this:
For LWZ based systems the 'LWZ-isg-modbus.csv' should now look something like this:
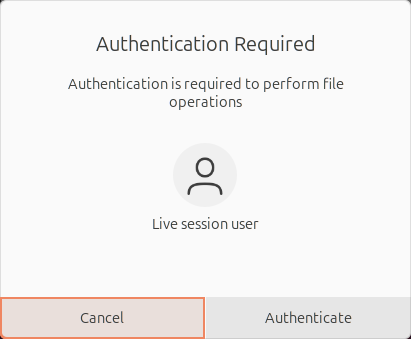
Save the file (CTRL-S), you need to Authenticate as the file is marked Read-Only. Click Authenticate to continue.
The changes have been made. You can now unmount the SD card or shutdown Ubuntu.
Step 9: Put the MicroSD card back into the ISG
Put the updated MicroSD card back in the ISG and screw the unit back together. Keep the original MicroSD card as a backup, you can always switch it back.
Links
- Homey integration for Stiebel Eltron heat pumps: Homey Integration
- More on the ISG Web Modbus Interface: Stiebel Eltron ISG Modbus interface
- Community changes of the ISG web modbus interface: zusätzliche Objekte im ISGweb für modbus/TCP freischalten